Welcome to the world of computers, devices and programming:)
In this small article I'll show how to setup an Android environment and I will make simple "Hello World!" (or "Hello AndroPhone!" ;) )
Before we start, we need:
- JDK -
http://www.oracle.com/technetwork/java/javase/downloads/index.html- Android SDK -
http://dl.google.com/android/android-sdk_r06-windows.zip- Eclipse IDE -
http://www.eclipse.org/downloads/So, lets get started.
I'll skip the explanations for installation of the JDK (Don't forget to set the Environment Variable
JAVA_HOME to
C:\Program Files (x86)\Java\jdk1.6.0_21 or smth similar to this).
Installing the Android SDKWe have to unzip the Android SDK and to execute the SDK setup.exe.
A terminal window will open for a few seconds, and then
Android SDK and AVD Manager will open.
If you get this error message: "
Failed to fetch URL https://dl-ssl.google.com/android/repository/repository.xml, reason: HTTPS SSL error. You might want to force download through HTTP in the settings." Choose
Settings on the left. Check
Force https://... sources to be fetched using http:// 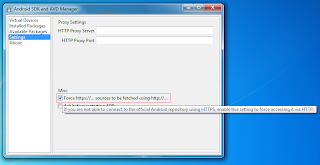
After we chose the version of the SDK and the API, we can continue with installation... It should finish in a while
Installing and configuring ADT Plug-inIn running Eclipse we have to select Help>Software Updates....
In the Available Software dialog, I click Add....
After that I enter the name for the remote site (for example, "Android Plugin") in the "Name" field, and in the "Location" field:
https://dl-ssl.google.com/android/eclipse/
In the Available Software view, I've selected the checkbox next to Developer Tools.
The final installation step here is to accept the license agreements and to restart the Eclipse.
After restart we have to configure the path to the Android SDK:
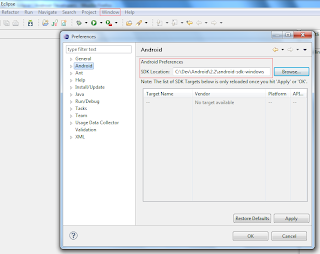
Note: If you have trouble acquiring the plugin, you can try using "http" in the URL, instead of "https" (https is preferred for security reasons).
Creating AVDThe last thing we need before start programming Android apps is to create new Vertual Android Device (AVD) from SDK setup.sdk.
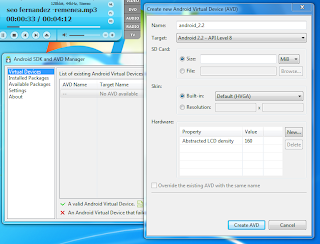
Now everything is ready...
Creating and running an Android ProjectWe can create new Android Project, and output something on the screen.
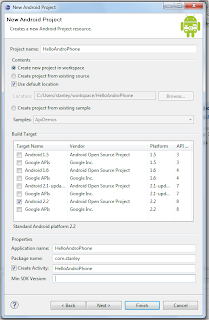
Here,
-
Project Name - the Eclipse Project name (the name of the directory that will contain the project files).
-
Application Name - human-readable title for the application (the name that will appear on the Android device_.
-
Package Name - package namespace, it must be unique.
-
Create Activity - the name for the class stub that will be generated by the plugin. This will be a subclass of Android's Activity class. An Activity is simply a class that can run and do work. It can create a UI if it chooses, but it doesn't need to. As the checkbox suggests, this is optional, but an Activity is almost always used as the basis for an application.
When the project is created, the plugin had created for us some class stub and ui things.
To check if we have normal working environment, we'll replace the code in HelloAndroPhone.java with:
package com.stanley;

import android.app.Activity;
import android.os.Bundle;
import android.widget.TextView;

public class HelloAndroPhone extends Activity {
    /** Called when the activity is first created. */
    @Override
    public void onCreate(Bundle savedInstanceState) {
        super.onCreate(savedInstanceState);
        TextView tv = new TextView(this);
        tv.setText("Hello, AndroPhone!");
        setContentView(tv);
    }
}
To run our project, we have to right-click the
HelloAndroid project folder and select Run As > Android Application.
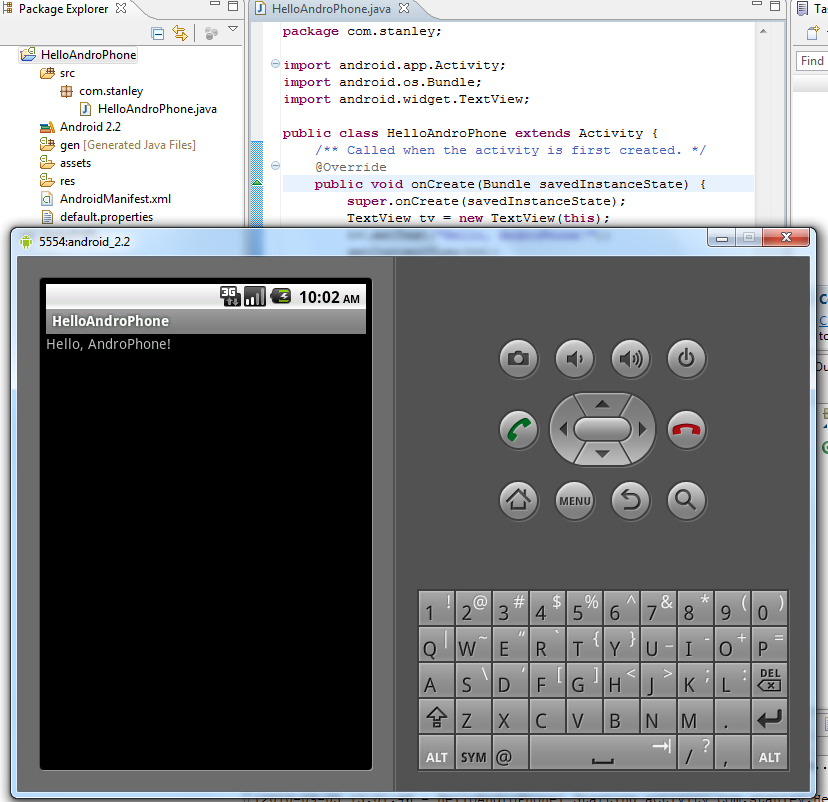
If all goes well,the emulator will open and we will see our first Android application!
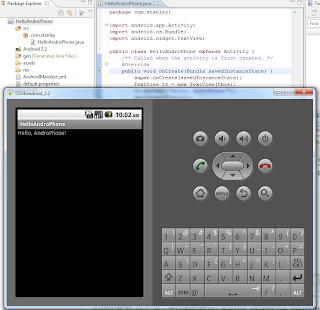
That's it. We have done our first Android application.